An ‘Encore Excursion’ this past week
…learning some new paint techniques for crafts and projects.
Paint finishes and effects are a favorite practice for projects and decorating. For years I have referred to Judith Miller books with guidance on ‘period finishes’. The outcomes for grisaille and marbling are remarkable…and achieved with painstaking steps.
When I was introduced to Annie Sloan Chalk Paint the finishes and effects sounded familiar …but in a fraction of the time! I think that is the true advantage of the chalk paint …it dries quickly and takes finishes quickly…both attractive features for a DIY project.
My thought was to take a chalk paint workshop and mix it up with what I know from the more traditional decorative finishes. My workshop was great.
Cheryl at Big White Goose in Canby OR has a workshop Chalk+Tea for learning Annie Sloan paint techniques. She is an engaging instructor and her shop is fully stocked. She has finished items to purchase and she offers great service.
Here are some of the highlights from the class…
Workshop Overview
We started with a board 6″x24″ – prepainted in 3 sections for the 3 lessons.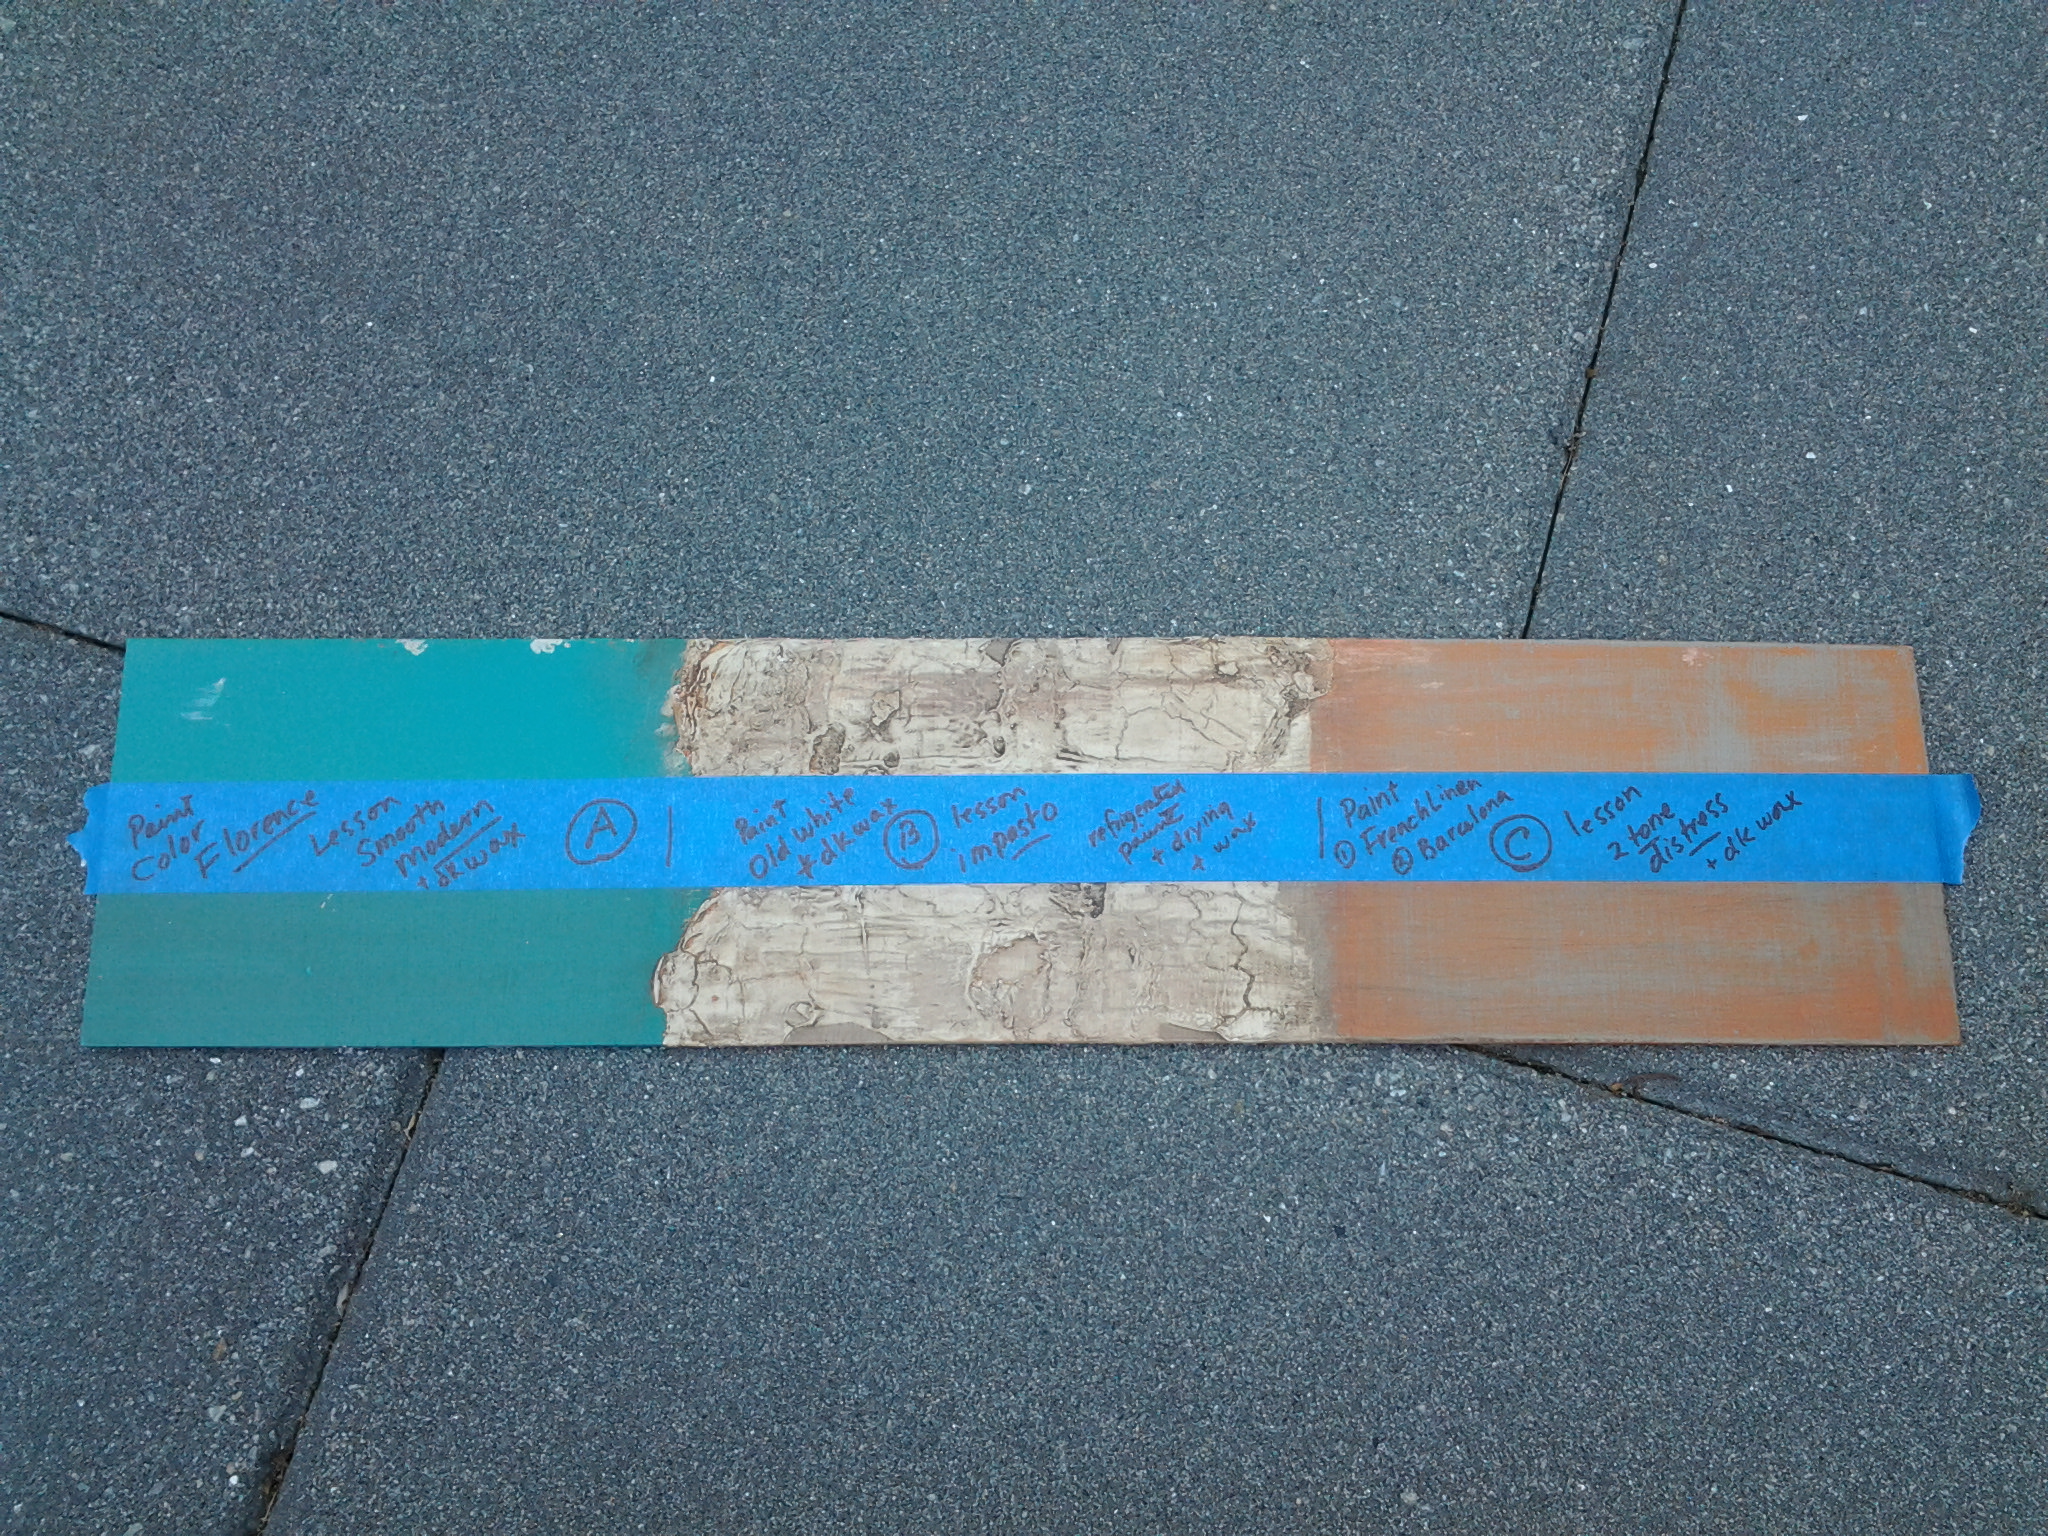
A. Modern smooth [ good surface for stenciling ]
B. Impasto [texture ]
C. Distress [for aging, worn look ]
Board above is my final from the workshop
D. Molding Techniques
We used Paint, Wax, Brushes, Soft Cloth [old T Shirt 12″ squares]
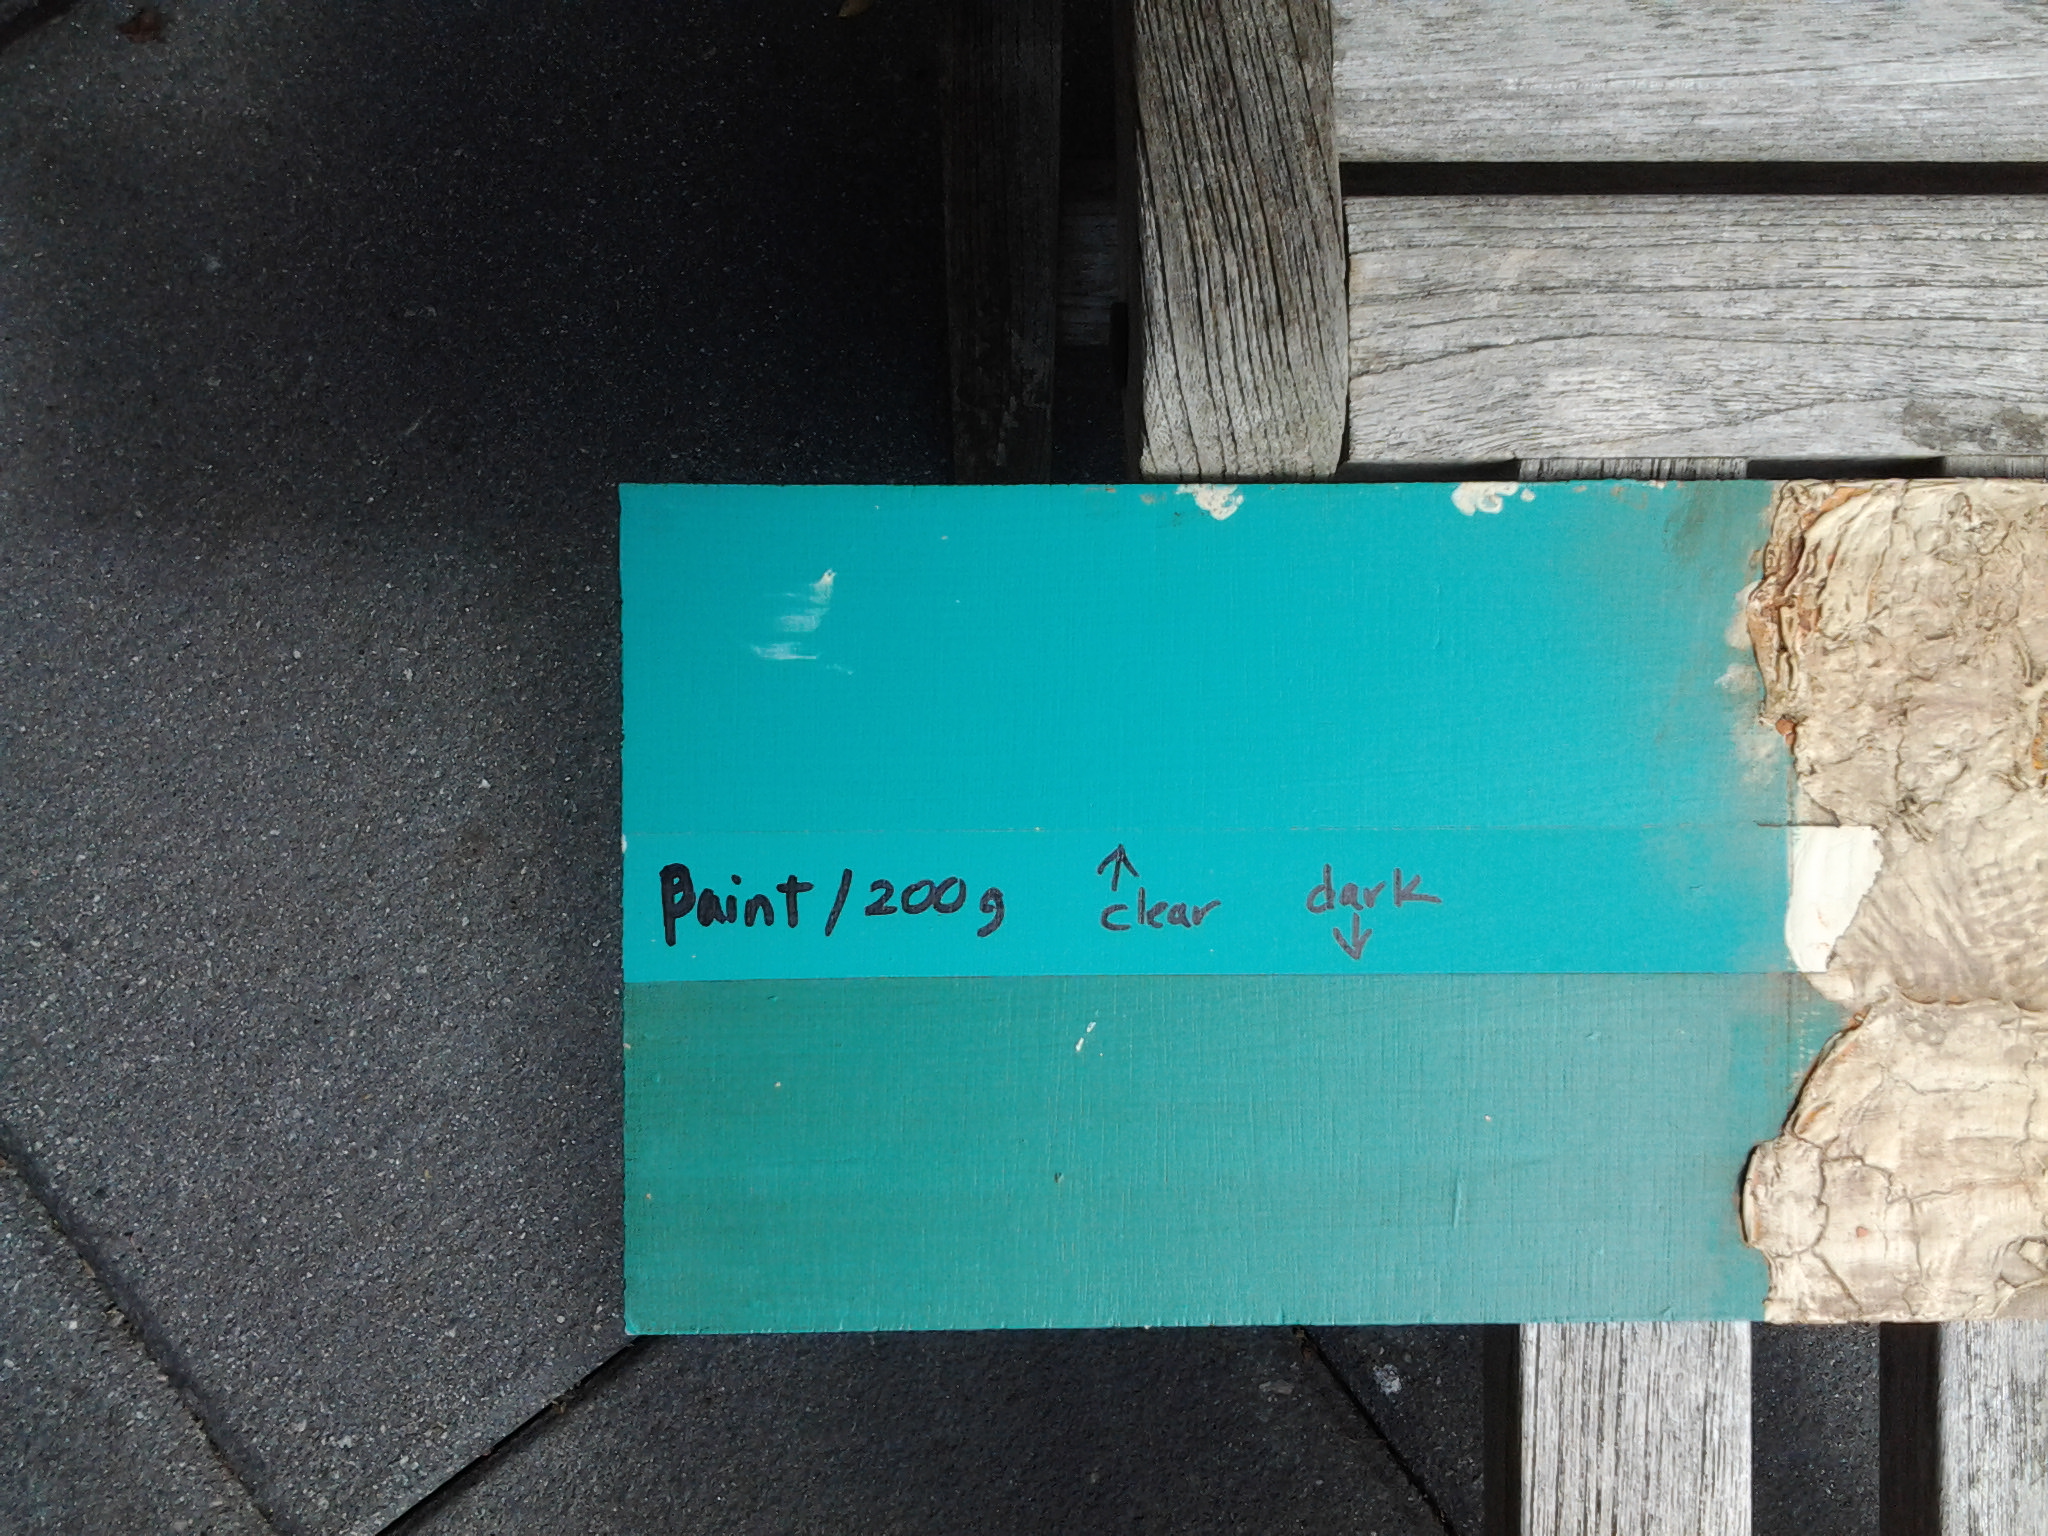
Modern smooth finish – A
Paint 2 coats of color on and allow to dry.
- tips for painting – brush in 1 direction for a smooth finish…drag the loaded brush in 1 direction!
 Use 600 grit sandpaper to smooth…baby bottom smooth.
- tips for sanding – cut paper into 4″ square, fold over and apply pressure with pads of fingers until smooth, wipe off dust
Apply wax.
- tips for wax – apply [with brush] & wipe [use soft cloth bunched into a smooth pad] in a small area 15″ sq at a time to control the look, try to apply in one direction for the surface area being worked, wipe off excess, next…
- wax /wipe / 24 hours return to ‘shine’ [optional]
If you want to stencil…apply stencil prior to waxing. Wax is a sealer. Waxed surface cures in 30 days to a hard finish.
Distressed finish – C
Paint 2 coats base color [French linen] in X’s to create a subtle texture. Allow to dry [ we used a hair dryer]. Paint contrast color [I chose Barcelona] on in one direction with long strokes. Dry completely.
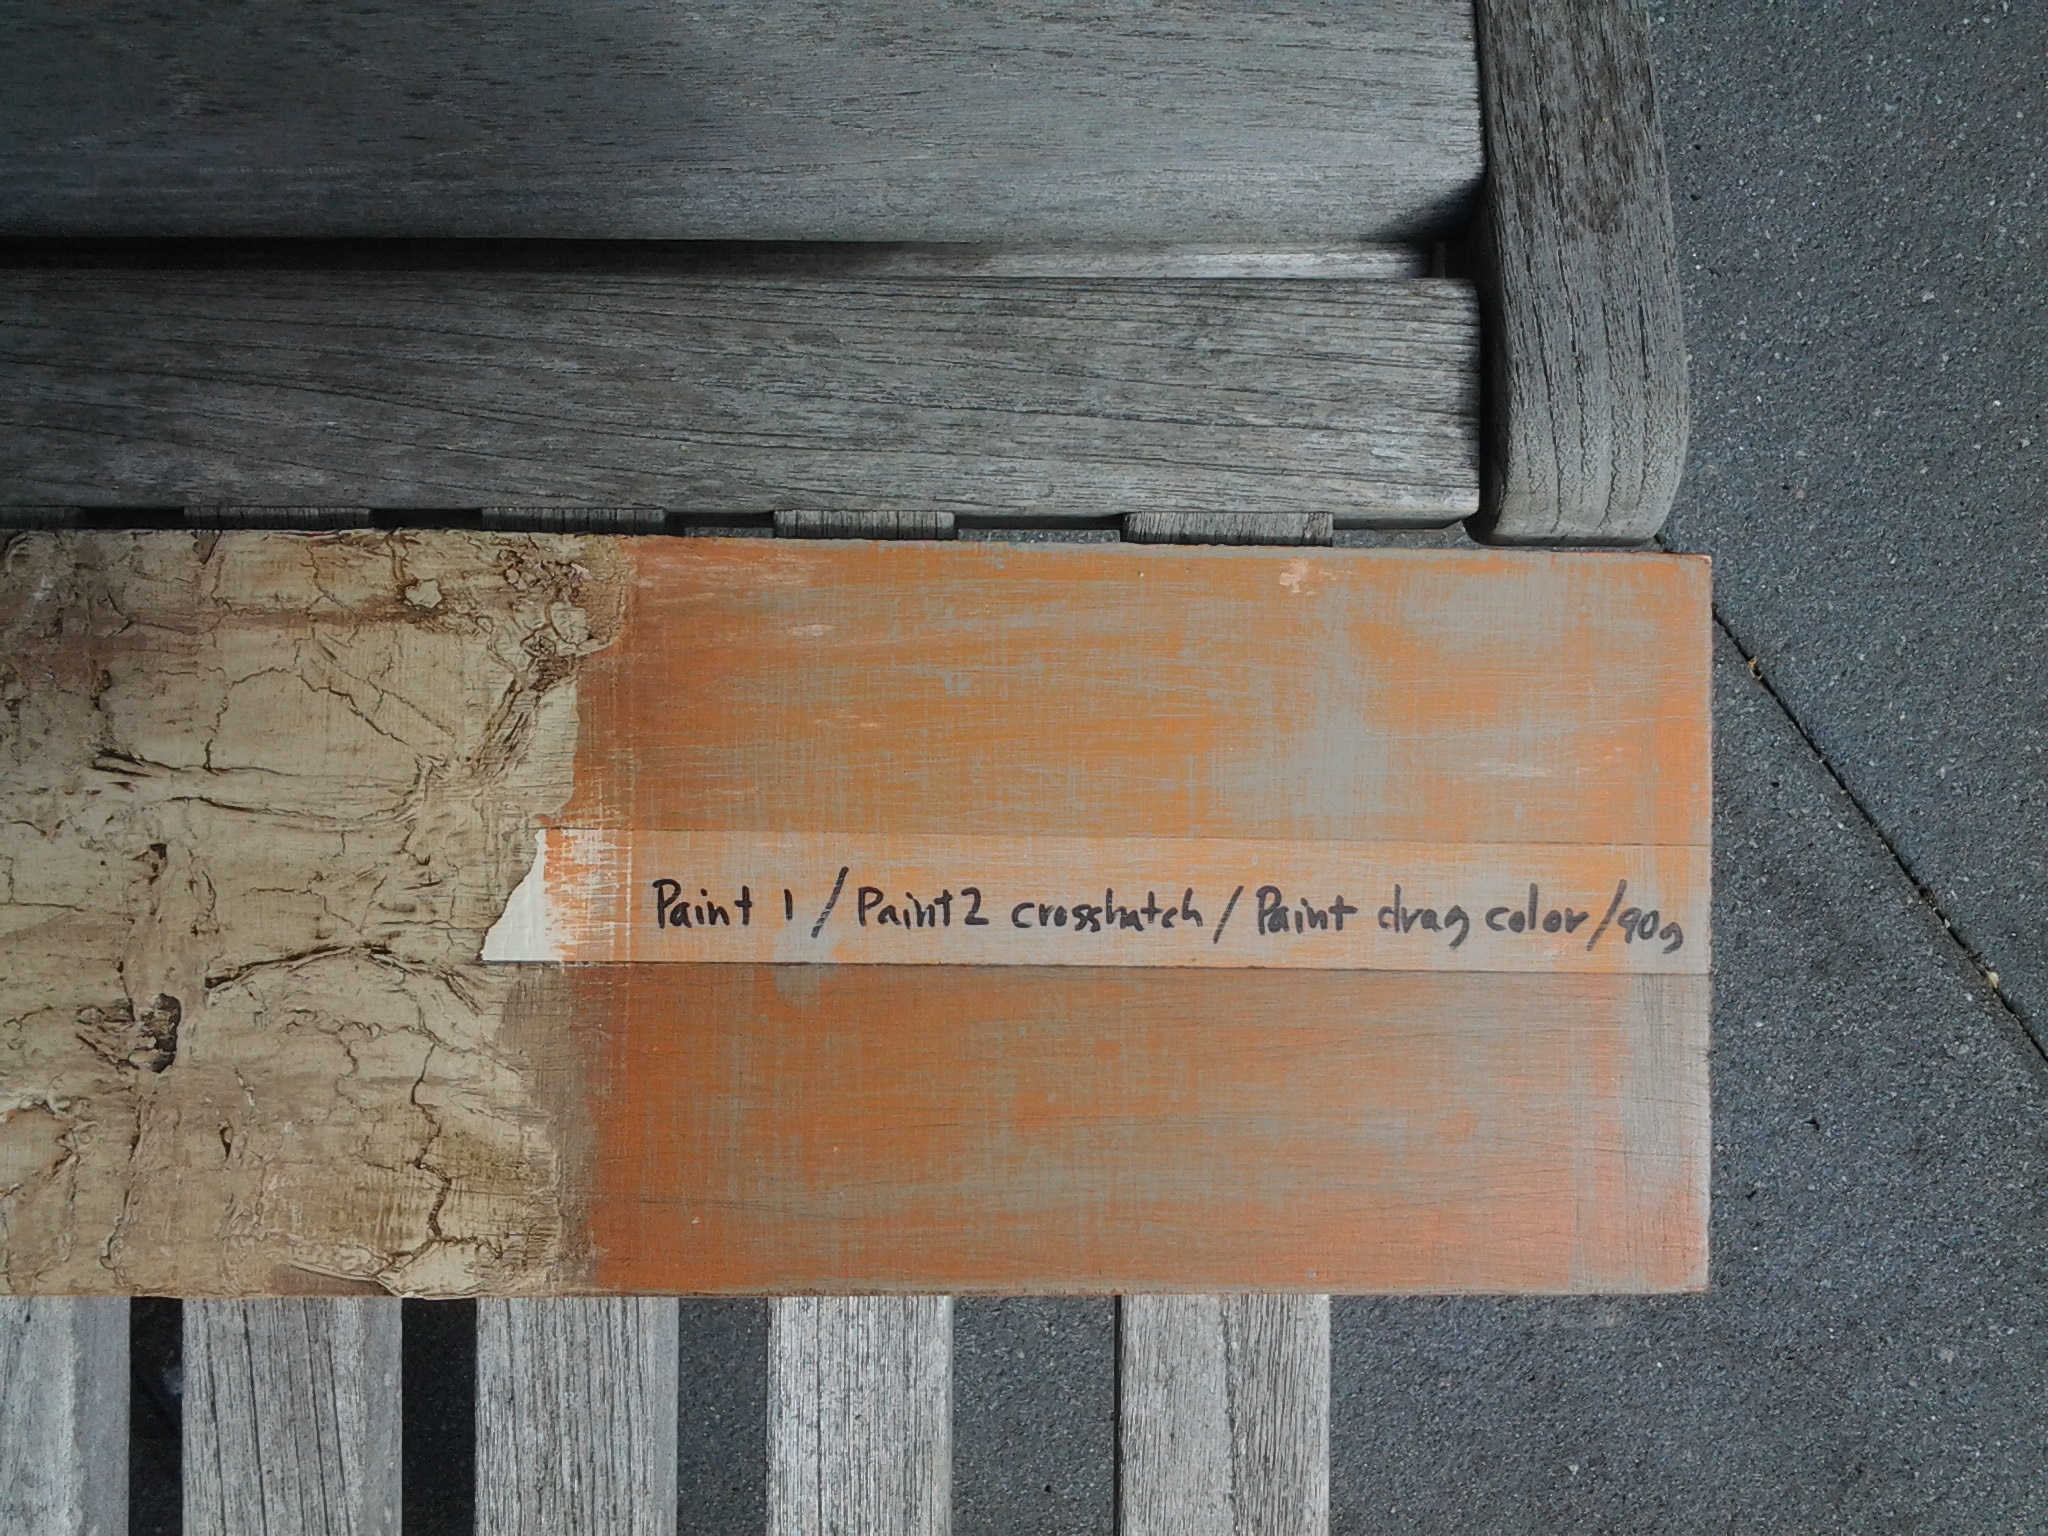 Sand using 220 – 90 grit [depends on the degree of distress desired]. Sand to the desired look.
I used 90 grit in cross hatch to create a linen look on sample. This distressing can be applied wherever a worn look is desired on the piece.
Brush / wipe off all the dust
Wax in one direction – my sample has clear upper and dark lower. Use same technique as above – wax small area, wipe. Using dark wax will show more detail and lines.
Impasto finish – B
This technique requires you to refrigerate the paint for at least 3 hours – it will thicken like a plaster.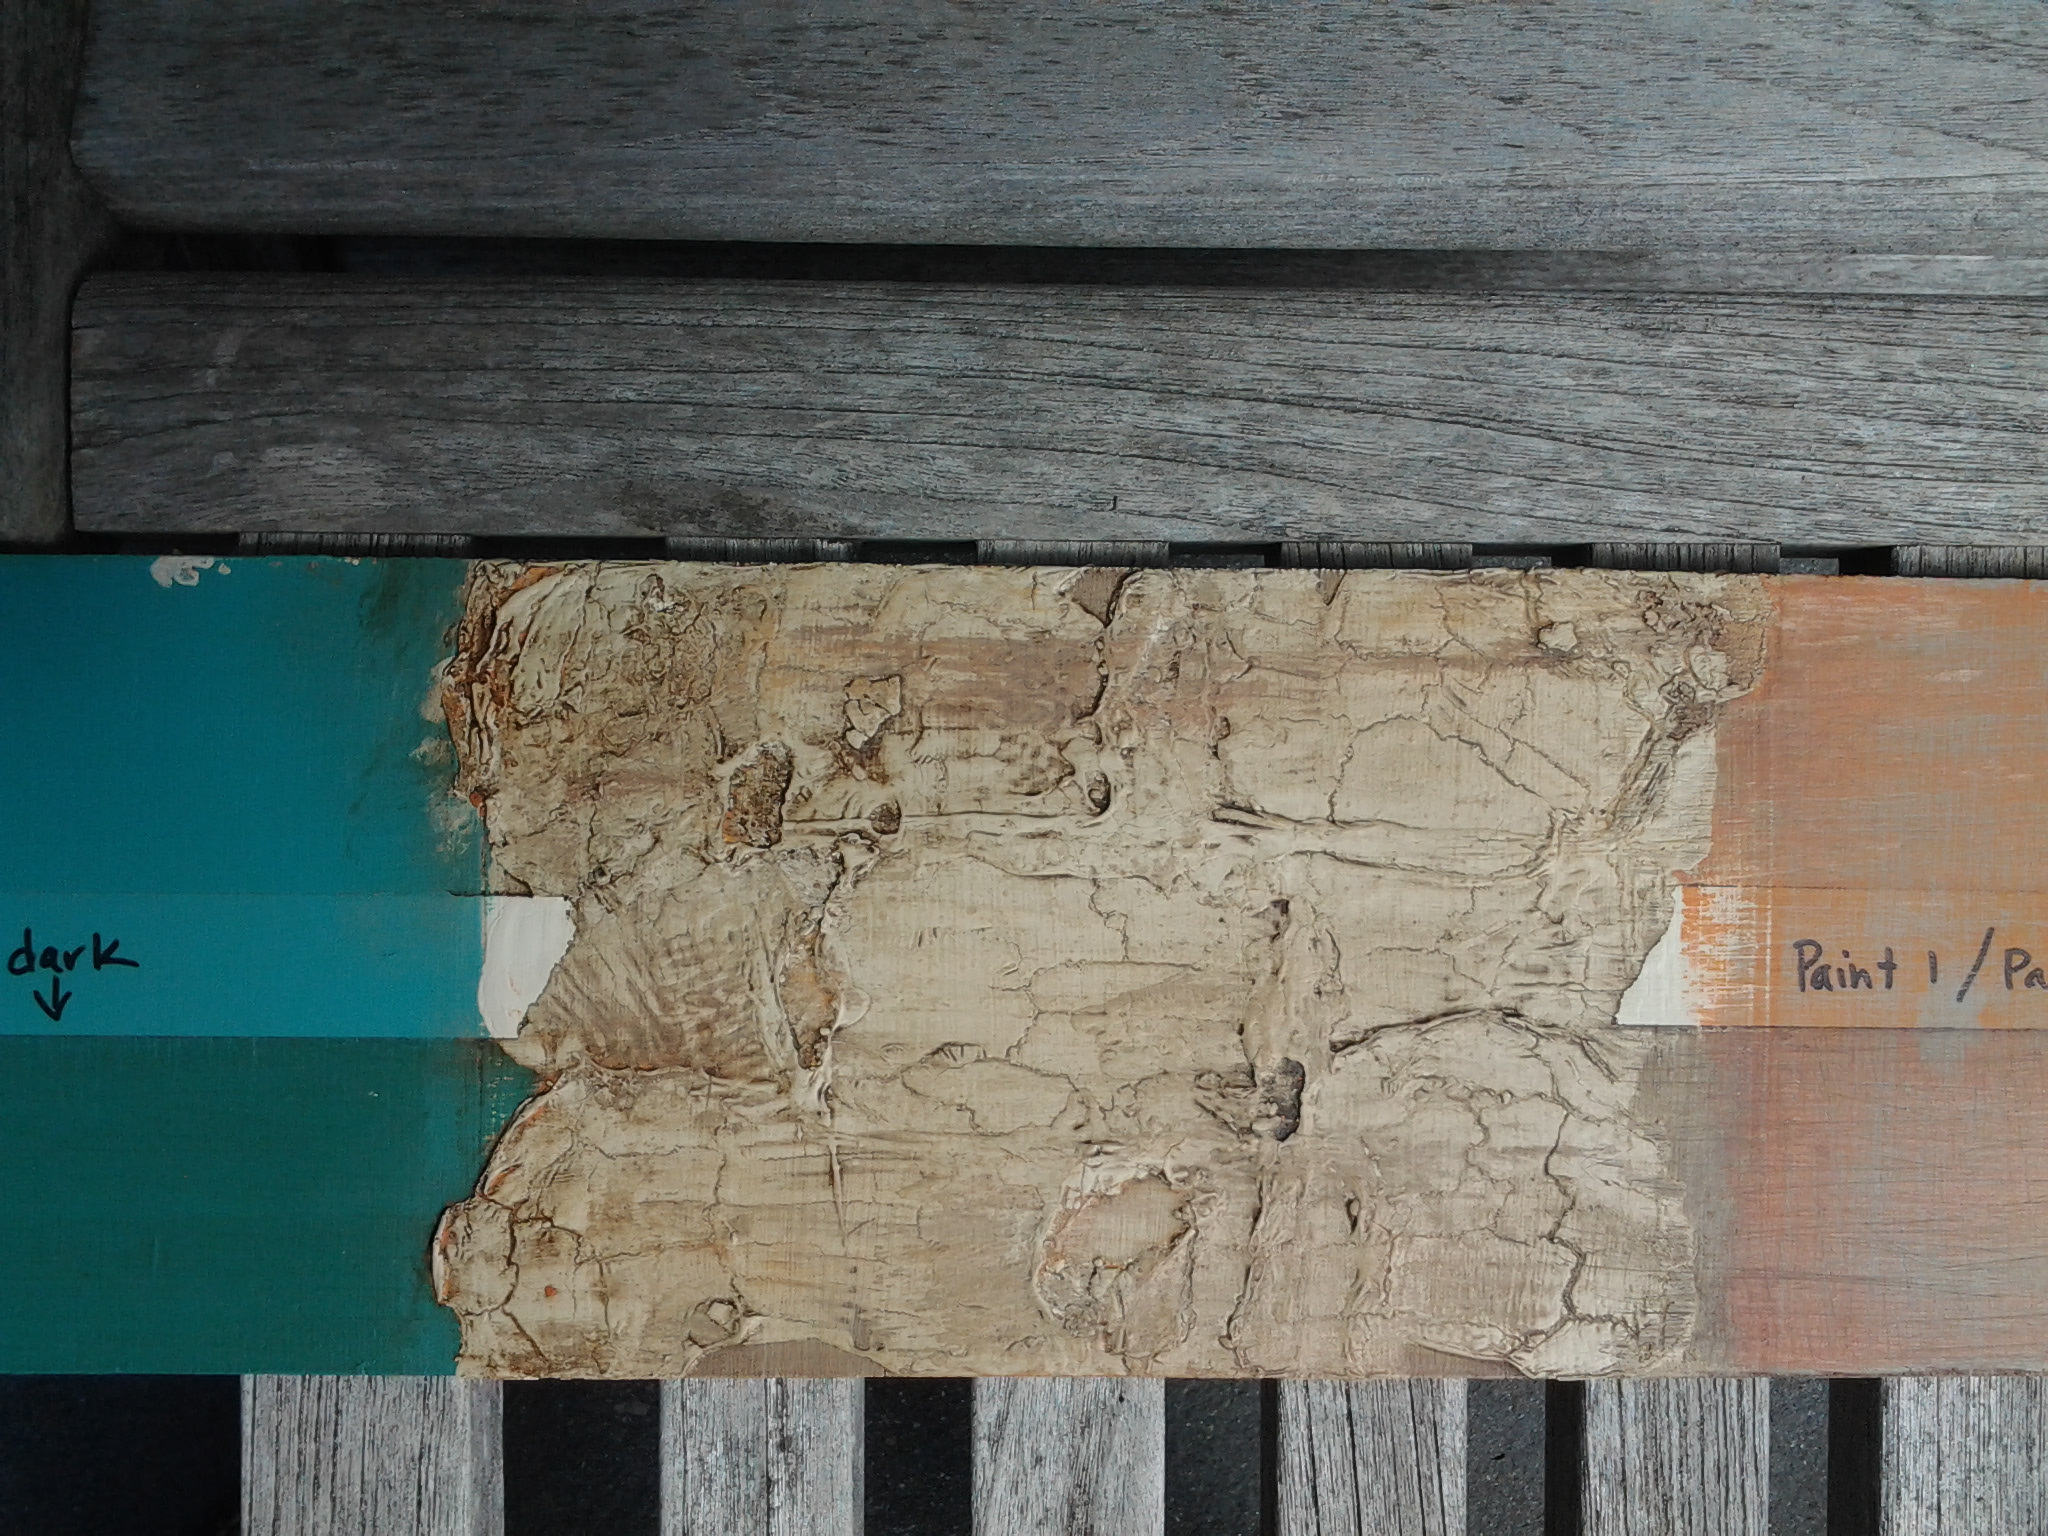
Apply using a brush to create the texture you desire. Then take a hair dryer and manipulate the drying to get cracking and to move the paint.
- tip for drying to a crackle – hold the dryer as close a possible perpendicular to the paint surface
Continue to work with the surface until you like the result.
Apply wax – dark wax will bring out the surface texture. In some places where the paint is not completely dry it will blend with the wax for an interesting look [upper center of my sample].
- tip for dark waxing – if an area is darker than desired …apply clear wax and it will lift the dark wax and then reapply.
Molding Techniques – D
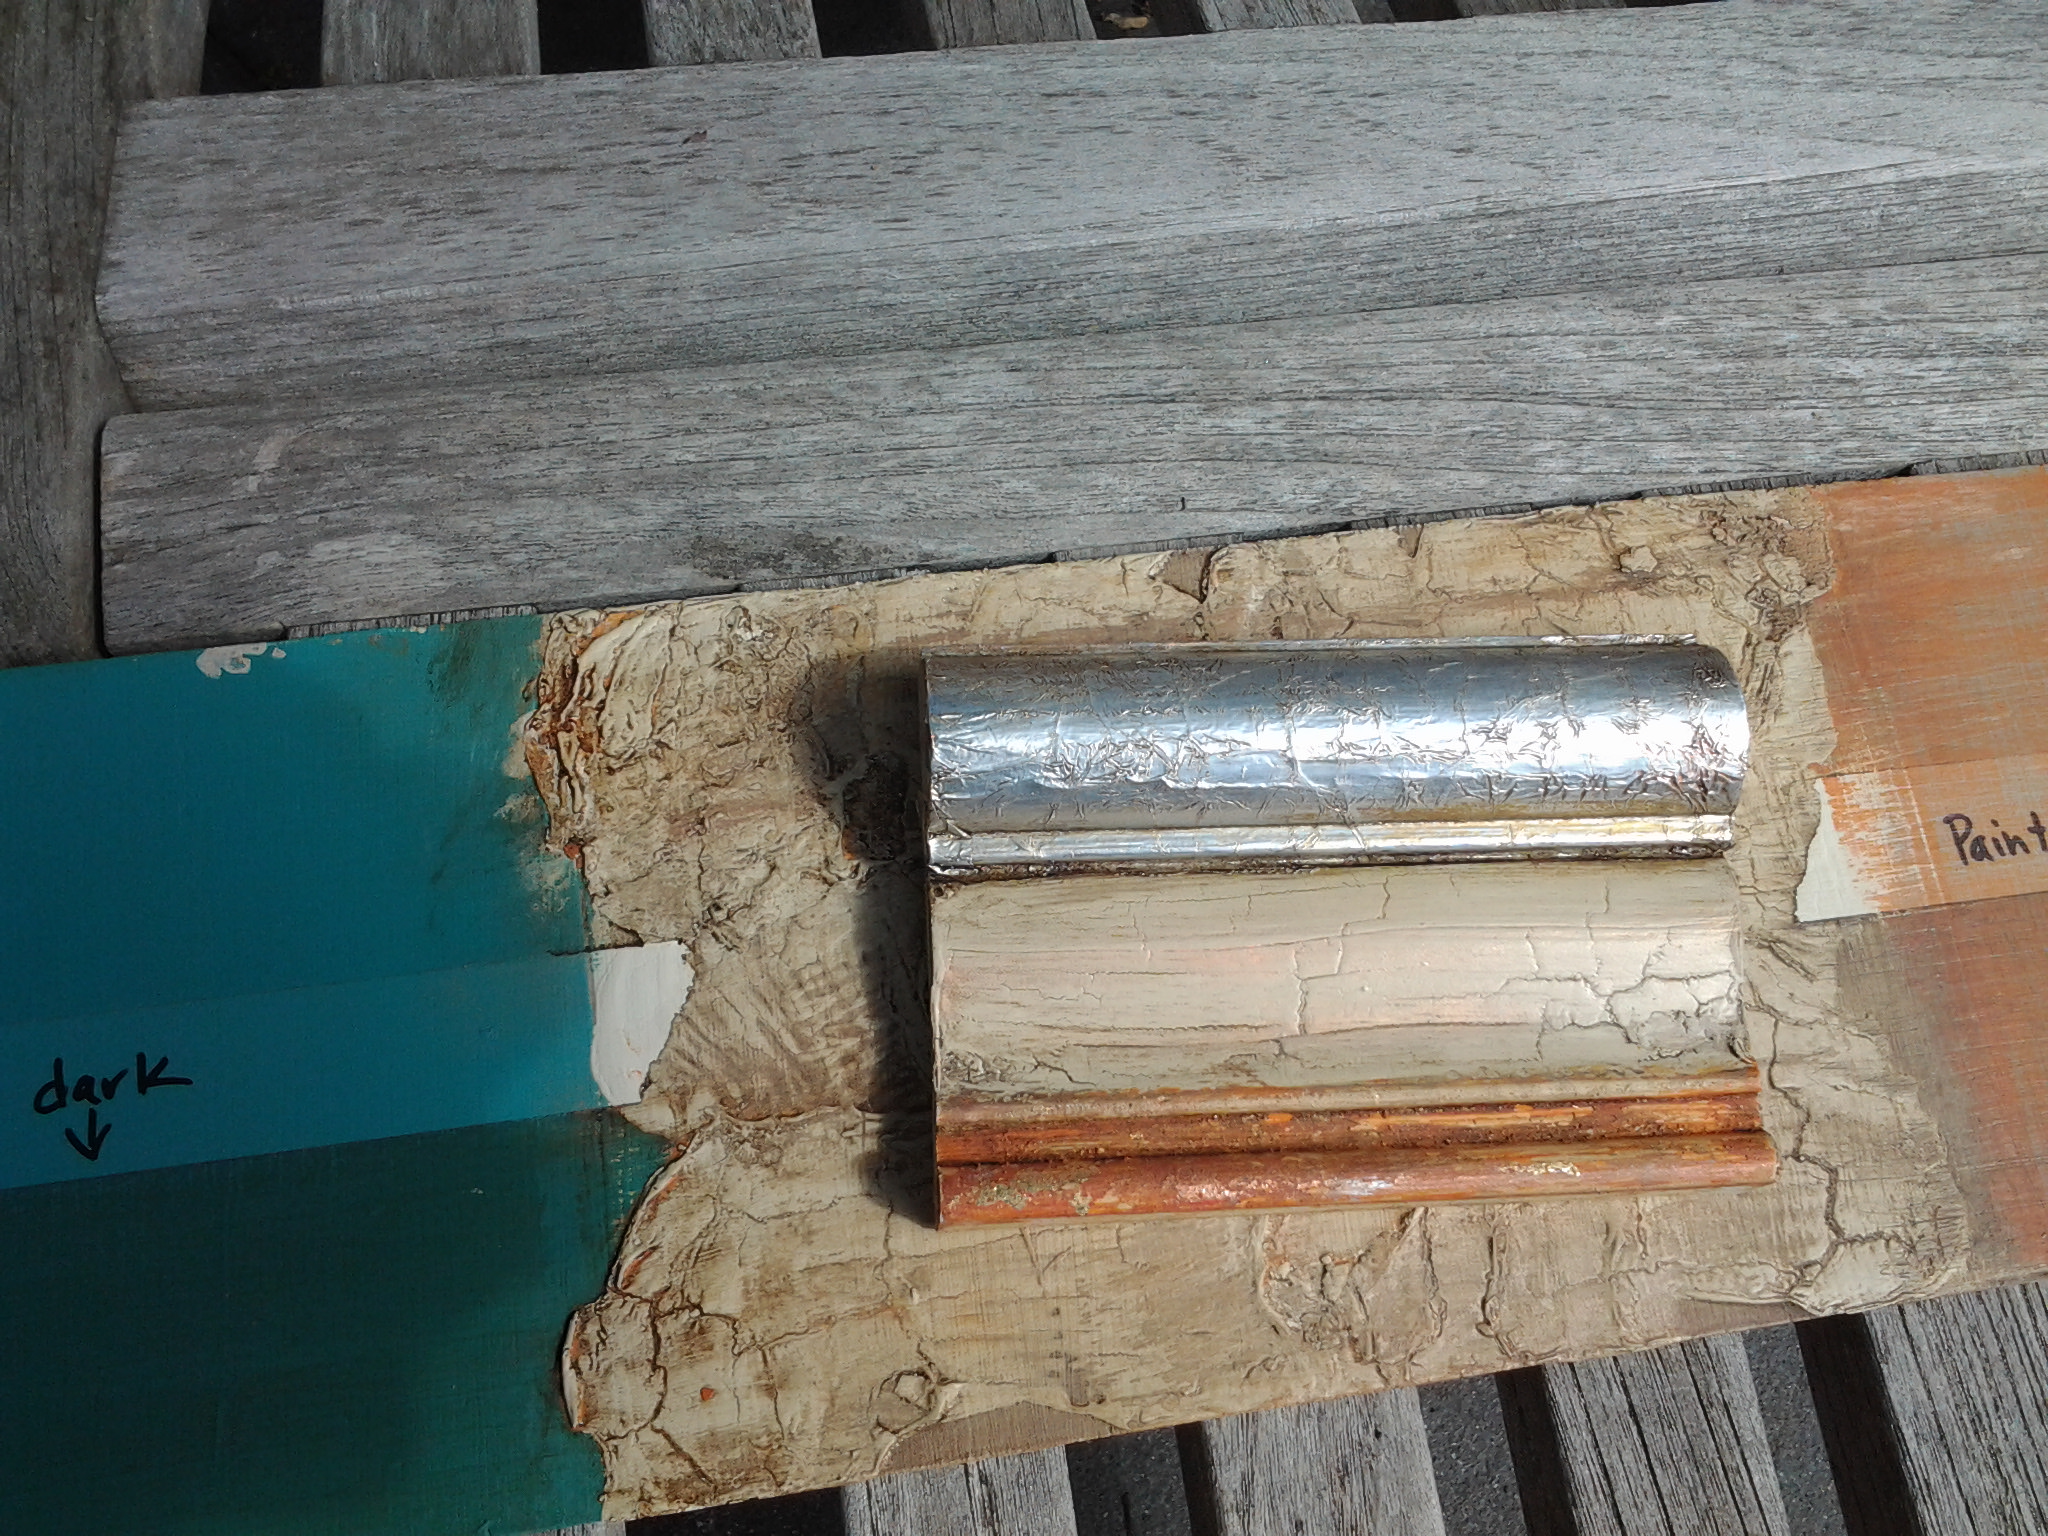 From top to bottom on the sample:
1- Reynolds Wrap with dark wax
2- Crackle with Dark Wax & French Gilding Wax
3- Foil Sheets Gilding
1- Reynolds Wrap – apply size and dry until tacky [ we used ‘Wunda Size’ ]. Apply Reynolds wrap to the sized area. TIP – crinkle the foil into somewhat the pattern you want. [ my sample is small wadded up creases ] Apply the foil and burnish with a soft cloth. Apply dark wax to bring out texture / or apply a paint color and wipe off / or a colored wax
2- Crackle requires that the paint be applied thick and dryed quickly with close application of a blow dryer – hold the dryer close on high hot setting – paint will crack. The sample has dark wax and some ‘French Gilding Wax’ [an upscale rub n buff type product] applied to highlights after the paint was completely dry.
3- Foil sheets are sold a craft stores and can be unruly to use. My sample photo does not show the foil areas very well. First apply paint color(s). Apply Wunda Size to area for gilding. Dry size to tacking touch. Apply gild sheet [I used a couple small 1″ pieces]. Burnish with a brush. Sample has dark wax finish.
ADDITIONAL TIPS:
Paint Sanding Dust! Save the dust and it can be added to clear wax to color the wax or added back to a color
Color Clear Wax formula – 80% clear wax + 20% color paint = colored wax [mix only in small batches 1/2 c]
Two Tone Painting – place 2 quarter size dollops of paint next to each other, load brush from center and pull in long strokes [practice … it works] This also can be applied with a small 3 inch foam roller for stenciling [makes the stencil look broken/worn]
Cheryl washes her brushes and painting rags in the washer!
Paint Fabric – such as upholstered chairs and cushions
Paint Leather – such as cowboy boots, handbags, shoes – follow the same steps – paint dry/2nd color dry/ gild- stencil- foil/ wax to protect
I am sure there are other tips I forgot. I encourage you to take an Annie Sloan workshop and have the hands on learning experience.

Leave a comment